Using that much alliteration in my title was unnecessary, I’ll admit that. But you clicked on it. Hello! Welcome! My name is Cynthia, and I love to crochet.
Not to come off cocky, but I consider myself to be a pretty accomplished crocheter. I’ve made dresses, sweaters, toys, and blankets in every pattern and size. I’ve used bulky yarn in blankets or threads in crochet lace. Although I am more than capable of following a pattern, I have gotten to the point where I can just see a garment in my mind and create it, no patterns involved.
I want to encourage you to try this method out, too. If you know even a few stitches, and count, and own a measuring tape, your only limit is your imagination. Come with me on this journey of learning to crochet intuitively.
This tutorial is not for beginners. It’s important that you already know the following stitches
- Chain
- Single crochet
- Double crochet
- Slip stitch
- Front post double crochet
- Back post double crochet
- Increase
So let us begin!
The first step to crocheting intuitively is knowing your measurements are attached to your body. This simply means you continue to add to your garment until it fits. Yes, it helps to know your actual measurements, but yarn is forgiving. You could honestly hold your item up to your body as you work and go by that.
For reference, I am a size zero or xs. Please add an inch or two per dress size to widths, or measure as you please.
This cardigan is made in five pieces; one back panel, two front panels, and two sleeves. The cloth is made using the following pattern;
You start each panel with a chain. You then crochet a row of double crochets into the chain. Once you finish, chain three. Into the next double crochet, front post double crochet. Into the next one, back post double crochet. Alternate between these two until the very end. Your next row will be the same pattern, only backward. Your cloth should look like this.

For the back panel, I chained 60, then followed the pattern I described above until I had a piece of cloth that measured 17” by 21”. Feel free to make this wider or slimmer to accommodate your body.

Next, I made the two front panels. Luckily, this is a simple piece, so there’s no need to decrease stitches to create a v-neck; it’s just two rectangles. Chain 30, then continue the above pattern until the last three stitches. Those you do as regular double crochets in order to make a nice edge. Don’t forget to start with three double crochets, then the pattern on the opposite panel. My two front panels measured 9” by 21”.

If you want to add buttons to your cardigan, mark them on your edges and use this tutorial here. I made mine five rows apart, but you can and as many or as few as you want, and whatever distance gives you the most joy.

Up next, the sleeves. I chained 30, then followed the usual pattern for six rows to create a cuff. Then, I increased one double crochet at the beginning of the next row and one at the end. I continued in pattern as usual, increasing two stitches per row every five rows. I continued this until the sleeve measured 16 inches in length. When you begin the next row, decrease eight stitches by doing eight slip stitches, then continue the pattern as usual until the final eight stitches. Ignore them. Just turn and repeat until you only have three or four inches in a row. Make another sleeve.

To assemble, sew everything together inside-out. The wrong side of your pattern looks like this.
When you get to the shoulder, only sew halfway into the neckline, like so.

Now, you make a hood. This hood is going to go right on top of what you already have. Choose your favorite top corner and continue the pattern across the front panel, the back, and the other front panel. Continue building until the hood is as dramatic as you want. I stopped when it was 15 inches tall, but feel free to take it as far as you want. Fold the top of the hood in half so the two top corners couch. Sew together.

Now, all women’s clothing deserves to have pockets. Cardigans are no different. Crochet two squares in pattern, however small or large your needs call for and sew them to the front panels.

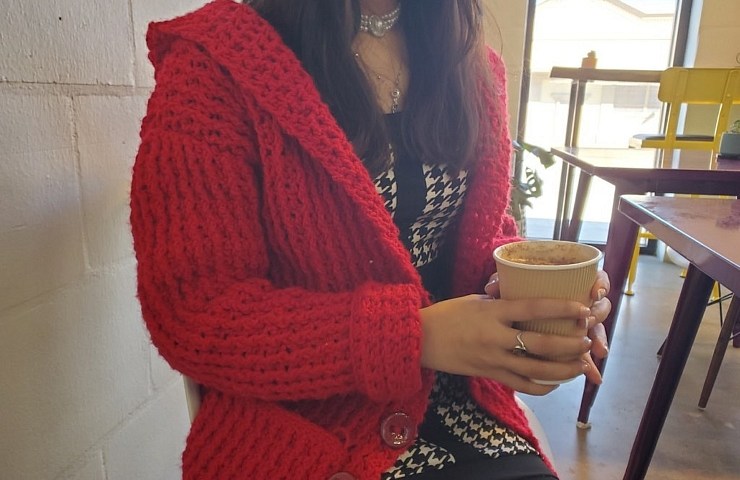
And there you have it! Choose your favorite buttons, give the cardigan a wash, and you’re ready to take this baby out on the town. I feel like Little Red Riding Hood, and I hope you will too! Intuitive crochet is something anyone can do given a little confidence and a solid knowledge of basic stitches. If you enjoyed this project, make up your own. With practice, you’ll learn to make garments just by looking at a picture.


Recent Comments